Nail Stamping 101: Nail Polishes

Wednesday, March 20, 2013

Hola Stampaholics!

Another question I get on  Instagram @swanettesnails:
What polishes do you used for stamping?

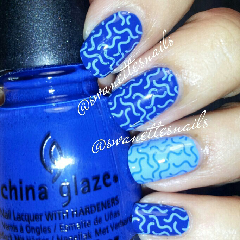
Many people think you need special polishes for stamping, but that's not true.  You can use regular polish for stamping.  That's the wonderful thing about stamping! 

Okay first I want to make it clear that I have never ever used a special stamping polish.  I don't want to mention brands but you get the idea.  So I honestly can't compare and tell you guys the difference between them, but  I can share with you my favorite stamping polishes.  I hope you enjoy!


Black Nail Polish:

1.  Wet n Wild Wild Shine nail color in Black Creme shown here.
2.  Wet n Wild Fast Dry Nail Color in Ebony Hates Chris shown here.
3.  Rimmel Lasting Finish Pro in Black Satin.
4.  Sinful Colors Black on Black.

Here are some Pictures:  

Rimmel in Black Satin & Sinful Colors in Black on Black


 Wet n Wild Black Creme             Rimmel Black Satin            Sinful Colors Black on Black


White Nail Polishes:

1.  Sally Hansen Hard as Nails Xtreme Wear nail color in White On.
2.  Sinful Colors Snow me White. 

Sally Hansen White On & Sinful Colors Snow me White

Sinful Colors Snow Me White            Sally Hansen White On
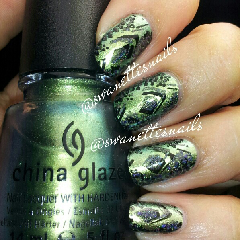
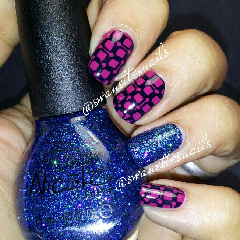

Metallics:

Alot of Metallics work, but here are the ones I like best.  

1.  Sally Hansen Color Quick Pens.  Chrome Polishes.  I got these on Clearance.  I am not sure if they are still available. 

2.  All of the Essie Metallic Collection Summer 2012 work great with stamping.  They are:  Essie Good As Gold,  Essie No place like Chrome,  Essie Nothing Esle Metals,  Essie Blue Rhapsody &.  Essie Penny Talk
 Sally Hansen Color Quick Pens

 Essie Metallic Collection Summer 2012

Sally Hansen Color Quick Pens          Essie Good As Gold         Essie No place like Chrome


These are my top picks if your starting in Stamping.  You see you don't have to buy special polishes.   You can even find them in your stash too!  Look for polishes that are opaque and thick.  The fun about stamping is experimenting.  

** TIP**  You can also thicken a polish so it becomes opaque and thick for stamping.  Just leave the bottle a little open and check on it to see if it has thicken.  I do this especially with I buy new polishes such as Rimmel Lasting Finish Pro in Black Satin, because when its new it is too thin to stamp with.  I also did this with Sally Hansen Hard As Nails Xtreme Wear in White On & Sinful Colors Black on Black. 

Before you go out and buy new polish remember to look in your stash and try out polishes in your collection and you might find your favorite stamping polish is already there! :)  Have fun! 

You are welcome to add your favorite polishes to stamp with in the comments section below!

Hasta Luego! 


Nail Stamping 101: Step #1

Tuesday, March 19, 2013

Hola Stampaholics!

I hope you all enjoy this series which I will try make for you guys.  It will be all listed under my label called Stamping 101.   Tips on Stamping.   Remember I am not a professional just a gal who loves stamping. 

Step #1 Remove the thin protective plastic off your stamping plate.

This might be the Silliest Step and you may think, "Why the heck would she post this?"  Well guess what? Many people skip this step. This is a very important step.  I wanted to make this step one because many people do not know that this thin plastic even exist.  Many plates that you buy over the internet don't bring instruction manuals so skipping this step can happen.    Heck it even happens to me! lol  Recently I was going to use a plate I bought along time ago but had forgotten to take off the thin plastic.  So here I am trying and trying to stamp and nothing.  I thought that the plate was defective , but when I take a closer look I notice the Clear plastic. lol  It happens to everyone! That is why I am making this post!

Okay back to Step #1 :
Take off the thin annoying pesky protective plastic that covers your plate!

When you receive your plates they come with thin layer of plastic.  Some are blue and some are clear! Yep clear and that's when you forget to take them off! lol  These things are super glued to the plates! ha ha ha  I just take a orange stick and lightly rub on the edge and pull off the plastic film.   It might take time but do it safely some stamping plates are sharp and can cut you. Believe me it hurts!  Here are picture of my stamping plates with the different thin protective plastic on them.  You can see they come in blue and in clear.


Now that you have taken off that annoying pesky film off the plate you may now test them.  I will try to be back as soon as possible with step #2 :)  I hope you enjoyed this silly but important post!

Hasta Luego!

St. Patricks Day Manicure

Hola!

I wanted to share with you my St. Patricks Day Mani.  I was so happy that I received a lot of likes and comments on them on my Instagram @swanettesnails !  I fell in love with a St. Patricks Day Mani a friend of mines did on IG she is @iheartmynails go check her out and follow!   I just loved her pot of gold she created using gold micro beads.

Here are the colors & tools I used:

1.  China Glaze I'm with the lifeguard for my base color.
2.  Winstonia stamping plate W105
3.  Finger Paint Scenery Greenery for stamping
4.  China Glaze Golden Enchantment for some sparkle.
5.  For my Ring Fingr I applied China Glaze White on White
6.  For my rainbow I used Colors from China Glaze neons 2012:  Surfing for boys, Orange You Hot, Sun-kissed, I'm With the Lifeguard & Splish Splash.
7.  For the pot I used Milani Nail Art Striper  in Black Sketch.
8.  Dotting Tools
9.  Gold Micro Beads
10.  Seche Vite Top Coat.

Hasta Luego!


PUEEN 2013 Nail Art Stamp Collection

Hola!  I hope you are all doing great! I got my Pueen stamping plates and I wanted to share with you guys my thoughts about them.  I bought them on ebay here for $19.99 free shipping.  If you live in Puerto Rico its your best option to buy them there on ebay.  You can buy them on Amazon here for $17.99, but  it is $10.49 for shipping to Puerto Rico.  Puerto Rico can no longer benefit from Amazon free Super Saver Shipping.  :(

This set has 25 plates, and the best part is they are mostly all full nail images! Each plate has 6 images:  4 full nail images and 2 small images.   If you love full nail images like me then you will love these plates.  I have been  analizing them for a long time.  Wondering if I would buy them or not until I started to see pics of them on Instagram.  I bought them and I am very happy with my decision.  At first glance the engraving has a different texture in the images not solid and clean like others.  Thankfully it doesn't effect the stamping at all.  Here are some pics I took testing out different images:


I am very impressed with the outcome of these stamping plates.  They Stamped beautifully.  You can see the details of the images they came out neatly.   They are the same size as the Bundle Monster plates, Red Angels, & Mash. The images are very cute and unique.  Here are some more pictures of manis I made with this set.  I hope you enjoy!
1.  Pueen plate 13 
Base Color:  China Glaze Watermelon Rind 
Stamping color:  Essie Good as Gold
2.  Pueen plate 14
Base color:  China Glaze Unpredictable
Stamping colors:  Sinful Colors Black on Black & Color Clubs Beyond
3.  Pueen plate 07
Base Color:  China Glaze Man Hunt & Orly Snowcone
Stamping Colors:  Using same base colors

So, tell me... What do you think?  Would you buy them?  

Hasta Luego! 


Winstonia Stamping Image Plates

Wednesday, March 13, 2013


Hola!

Lately I have been loving my Winstonia Stamping Plates.  I first saw them on Instagram.  The manicures using these plates where gorgeous so I just had to buy them.  I bought them here for $15.99.  It comes with 20 plates.  For .80 cents per plate it makes them a great deal.  They ship to Puerto Rico for $1.99 and they arrived within a week. I love the designs they are very different.  The engravings on the plates are the perfect depth.  I had no problems transferring the designs on to my nails.  You can find special codes to apply to your order if you google them.   Here are several designs that I have made using the Winstonia Stamping Plates:

 1.  Winstonia plate W113.
Base Color: China Glaze Designer Satin. Stamping color: Sally.Hansen Night Flight. 
Ring Finger: Nicole by OPI Kendall on the Katwalk.

2.   Winstonia W111
Colors:  Orly Charged Up, Orly Bubbly Bombshel & Orly Can't Be Tamed. 

3.  Winstonia W112
Base Color:  Color Club Cosmic Fate  Stamping Color:  Sinful Colors Black on Black

 4. Winstonia W107
Using China Glaze Ombre Wait Teal You See Set. Colors from Cuticle to tip: White on White , Aquadelic, For Audrey & Turned up Turquoise. I also applied CG Fairy Dust. 

5.  Winstonia W110
Base Color: OPI Did It On 'Em Stamped with: China Glaze Con-fuse?

So what do you think?  Will you buy them?  Let me know?  

Hasta Luego! :) 

* I wanted to add the size of the plates are almost 2 1/4 inches wide.  Images measurements are 1/2 inches x 5/8 inches.  

Nail Stamping 101: Stampers & Scrapers

Tuesday, March 5, 2013

Hola!

I get so many questions about stamping on IG so I decided to write about stamping.   I have been stamping for almost 3 years.  I remind you that everything posted is my own opinion and I am not a professional.   I will try my best to help you guys out with stamping.

I want to start with My stampers!  My first Stamper and Scraper is the one pictured below :  Konad Stamp and Scraper.  It had been my favorite for a long long time!  Until I met someone else... lol.  I will explain later.  The clear surface makes it better to see the image.  It picks up images great.  I also use the scraper.  I know many people do not use the scraper, because they say it damages the plates.  It does leave light scratches on the plate but it has never never damage a image print.   For me it has been easier to work with the scraper and the images look way much better, but this is my opinion.  Everyone does what is best for their stamping and plates. The only con has been that polishes have stained my nail stamper. 


Then one day I decided to try the Konad Double Ended Stamper and Scraper pictured below.  As you see its still brand new.  I just couldn't let go of my first stamper.  Don't get me wrong many people love this stamper.  I have used it and it has works great but it was just much more easier for me to use my first stamper. I guess I was already accustom to handling my first stamper.  But overall it does what its suppose to. 


Finally I bought this bad boy!   I bought it on Ebay for $2.29 here is the site.  I have been trying it out for two weeks... and I am in Love! I just couldn't believe that this cheap stamper was going to work!  Its wonderful! I love it so much I just had to order another!  Its super soft and picks up the image great.  You don't have to press hard on the nail the image goes on smooth.  Its molds to your nails.  Its simply wonderful.  And the scraper works great! It leaves no scratches and I think many people would love it.  You should definitely try it out! 


These are all of my stampers and scrapers.  I clean them with 100% acetone. I recommend all of them but if I would have to chose it would be the last one.  I thought I would never leave my Konad stamper for no one! Lol Until I found him! :)  Don't get me wrong I still love my first Konad stamper and scraper and think that its a must for any stamper's collection.

Hasta Luego! :)  Until next time!
 
FREE BLOGGER TEMPLATE BY DESIGNER BLOGS